Step 7: Using the installation wizard
Proceed through the installation wizard to accept licenses, install and configure Cloudera Runtime, and more.
Upload License File
On the Upload License File page, you can select either the trial version of CDP Private Cloud Base or upload a license file:
- Select one of the following options:
- Upload Cloudera Data Platform License
- Try Cloudera Data Platform for 60 days. The CDP Private Cloud Base trial does not require a license file, but the trial expires after 60 days.
If you have a license file for CDP Private Cloud Base, then perform the following steps to upload the license file:- Select Upload Cloudera Data Platform License.
- Click Upload License File.
- Browse to the location of the license file, select the file, and click Open.
- Click Upload.
- Click Continue.
If you select the Try Cloudera Data Platform for 60 days option which is CDP Private Cloud Base Edition Trial, you can upload a license file at a later time. Read the license agreement and select Yes, I accept the Cloudera Standard License Terms and Conditions if you accept the terms and conditions of the license agreement. Then click Continue.
- Click Continue to proceed with the
installation.
The Welcome page displays.
Add Private Cloud Base Cluster
The Add Private Cloud Base Cluster wizard provides a brief overview of the installation and configuration procedure, as well as some links to relevant documentation.
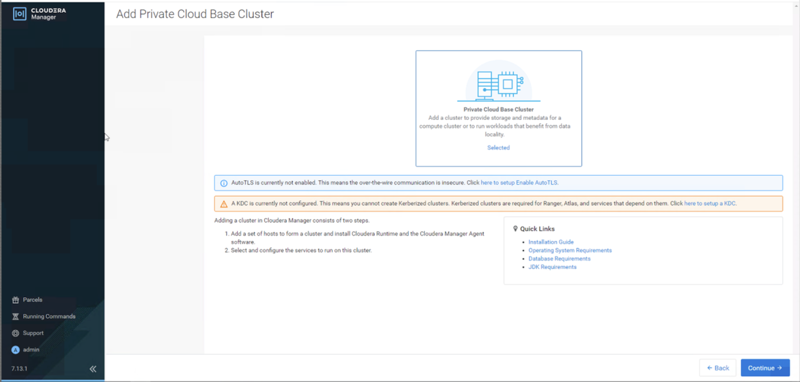
Setup Auto-TLS
The Setup Auto-TLS page provides instructions for initializing the certificate manager for auto-TLS as part of setting up a new cluster.
This setup assumes that Cloudera Manager is the Certificate Authority (CA) to create and manage all the certificates for the cluster (either self-signed certificates or when Cloudera Manager acts as part of the customer intermediate Certificate Authority (CA) chain).
In case you do not approve adding Cloudera Manager to your intermediate CA chain, it means you are responsible to generate and maintain all the cluster certificates (that is the Use Case 3). In such a case, setting up AutoTLS should not be used.
Setup a KDC
A Key Distribution Center(KDC) is required in order to create kerberized clusters. Kerberized clusters are required for Ranger, Atlas, and other services that depend on them.
The Setup KDC for this Cloudera Manager wizard walks you through the steps to configure Cloudera Manager for Kerberos Authentication. On completing the steps, the wizard displays a message indicating that KDC is setup and you can now create kerberized clusters.
Cluster Basics
The Cluster Basics page allows you to specify the Cluster Name
For new installations, a Regular Cluster (also called a base cluster) is the only option. You can add a compute cluster after you finish installing the base cluster.
For more information on regular and compute clusters, and data contexts, see Virtual Private Clusters and Cloudera SDX.
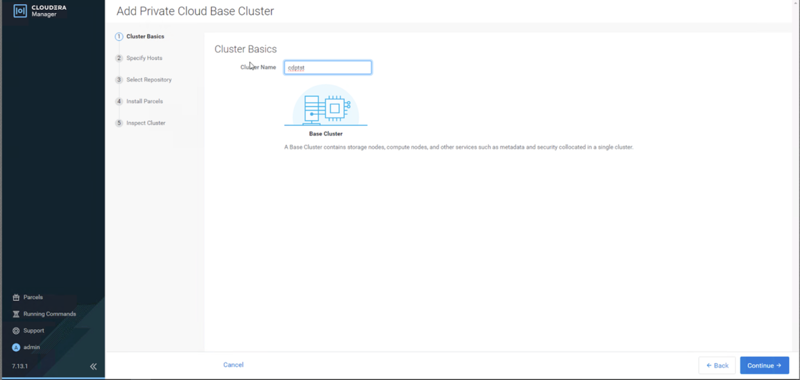
Enter a cluster name and click Continue.
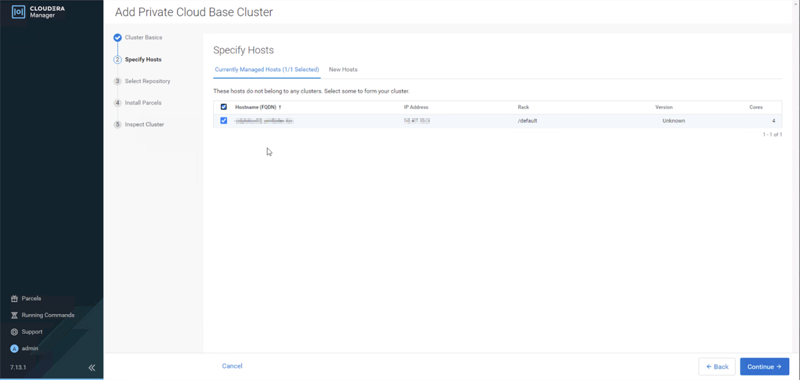
Specify Hosts
- To enable Cloudera Manager to automatically discover hosts on which to install Runtime
and managed services, enter the cluster hostnames or IP addresses in the
Hostnames field on the New Hosts tab. You can specify hostname and IP address ranges as follows:
Expansion Range Matching Hosts 10.1.1.[1-4] 10.1.1.1, 10.1.1.2, 10.1.1.3, 10.1.1.4 host[1-3].example.com host1.example.com, host2.example.com, host3.example.com host[07-10].example.com host07.example.com, host08.example.com, host09.example.com, host10.example.com You can specify multiple addresses and address ranges by separating them with commas, semicolons, tabs, or blank spaces, or by placing them on separate lines. Use this technique to make more specific searches instead of searching overly wide ranges. Only scans that reach hosts running SSH will be selected for inclusion in your cluster by default. You can enter an address range that spans over unused addresses and then clear the nonexistent hosts later in the procedure, but wider ranges require more time to scan.
- Click Search. If there are a large number of hosts on your cluster, wait a few moments to allow them to be discovered and shown in the wizard. If the search is taking too long, you can stop the scan by clicking Abort Scan. You can modify the search pattern and repeat the search as many times as you need until you see all of the expected hosts.
- Verify that the number of hosts shown matches the number of hosts where you want to
install services. Clear host entries that do not exist or where you do not want to install services.
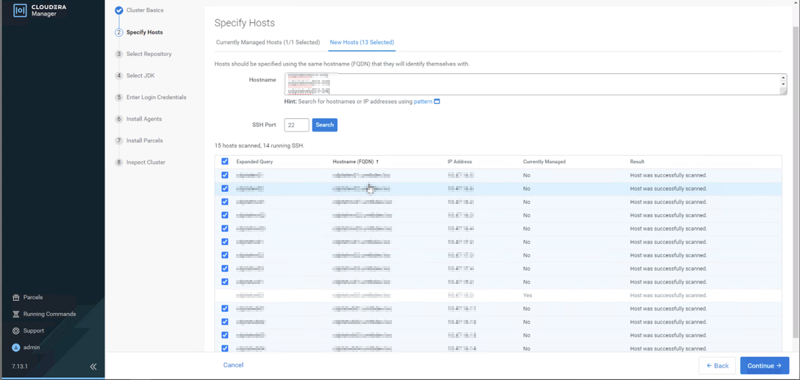
- Click Continue.
The Select Repository screen displays.
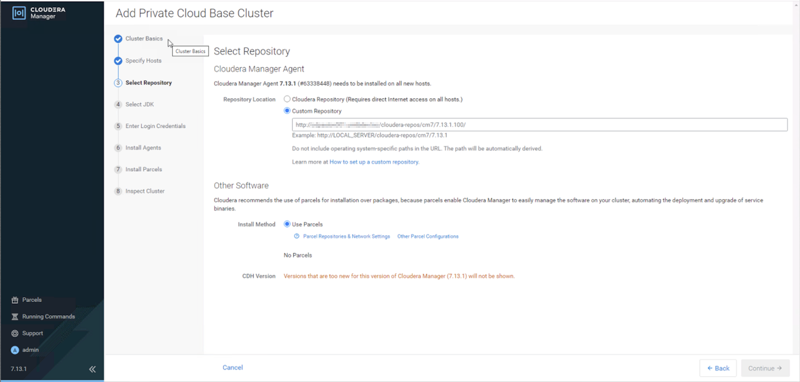
Select Repository
The Select Repository page allows you to specify repositories for Cloudera Manager Agent and Other software.
In the Cloudera Manager Agent section:
- Select either Cloudera Repository (in case all cluster nodes have direct access to the Internet) or Custom Repository for the Cloudera Manager Agent software.
- If you select Custom Repository, ensure the path points to the local repository you have previously prepared as seen in the following example. For instructions on setting up a custom repository, see Configuring a Local Package Repository.
-
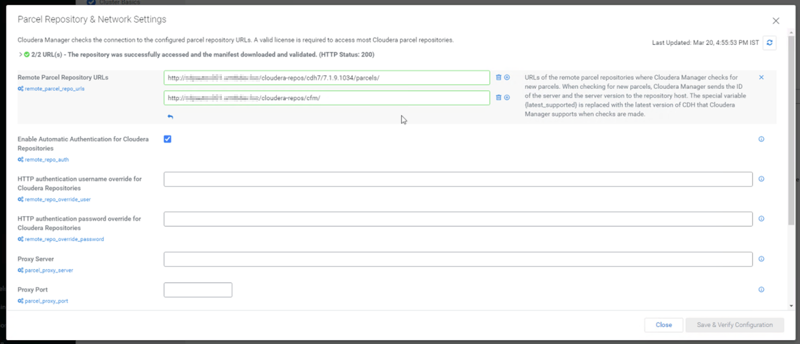
Under , choose Parcel Repositories & Network Settings to validate/setup the local repository setting.
-
On the page that will open, ensure to validate the local repository location for the CDH parcels you will install and for any other parcel you want to bring to the cluster (the following example also shows Cloudera Flow Management (=Nifi) repository.
-
Once you have updated the URL, click Save & Verify Configuration and you should see that the URLs were successfully validated.
-
Any default URL that points to the Internet (https://archive.cloudera.com/XXX) should be removed.
-
Once done, click Close.
-
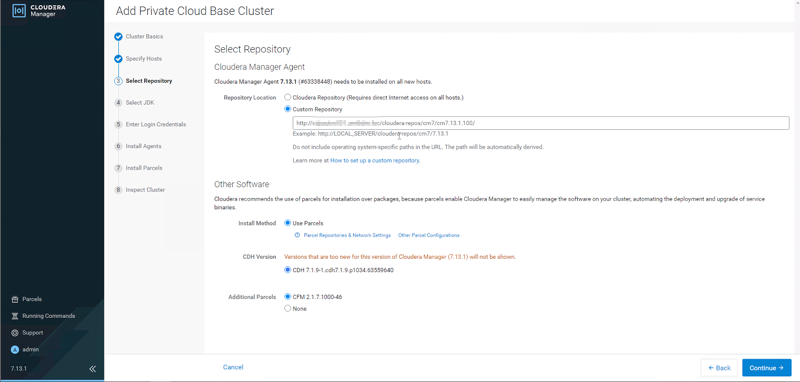
Now on the screen you should see the chosen CDH release (assuming you had one in your local repository) and any additional parcels you set to deploy (in the following example - CFM parcels)
-
Click Continue.
Select JDK
In most cases for customer deployments, the customer is providing an OS deployment that comes pre-installed with the Java version that was asked for the cluster.
As such, you should select to Manually manage JDK.
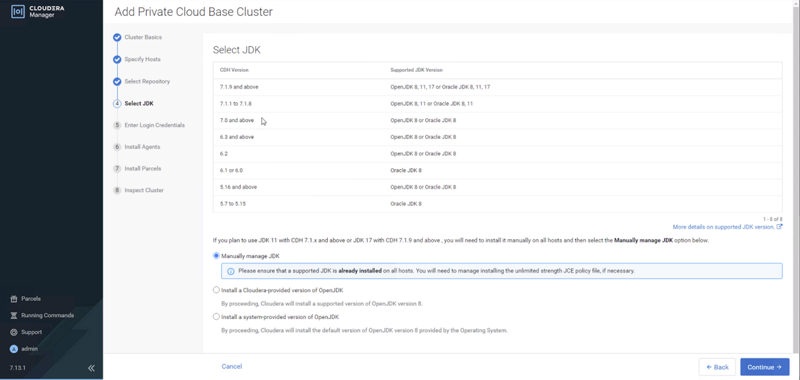
After selecting the applicable boxes, click Continue.
Enter Login Credentials
- Enter the root name or username for the
rootaccount that has password-lesssudoprivileges. (In the/etc/sudoersfile, the entry for this should like this:%<username> ALL=(ALL) NOPASSWD: ALL - Select an authentication method:
- If you select the All hosts accept same password option for
password authentication, enter and confirm the password.
In most cases, customers will not provide the root credentials, rather they will provide a local user that is capable of performing sudo to user root without a password on any station. That user should be allowed by the customer to “hop” using ssh from the Cloudera Manager (CM) node to all cluster nodes without a password to allow the cluster installation and parcel distribution.
- If you select the All hosts accept same private key option for public-key authentication, provide the matching OpenSSH private key file provided by the customer for the given local power user. In case the OpenSSH private key is encrypted (which is not the default case) please provide the passphrase to open the private key.
You can modify the default SSH port if necessary.
- If you select the All hosts accept same password option for
password authentication, enter and confirm the password.
- Specify the maximum number of host installations to run at once. The default and
recommended value is 10. You can adjust this based on your network capacity.
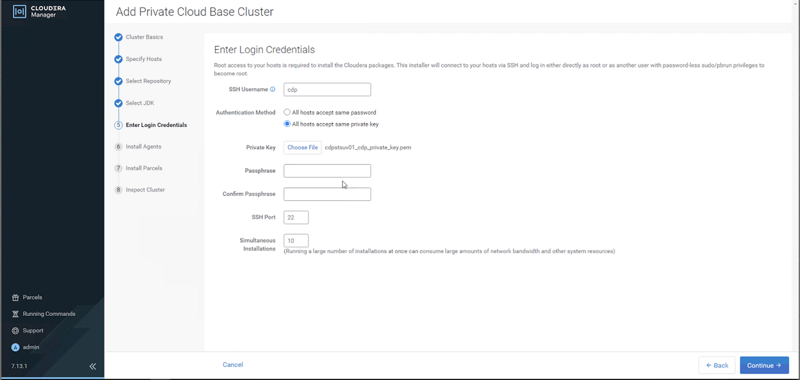
- Click Continue.
The Install Agents page displays.
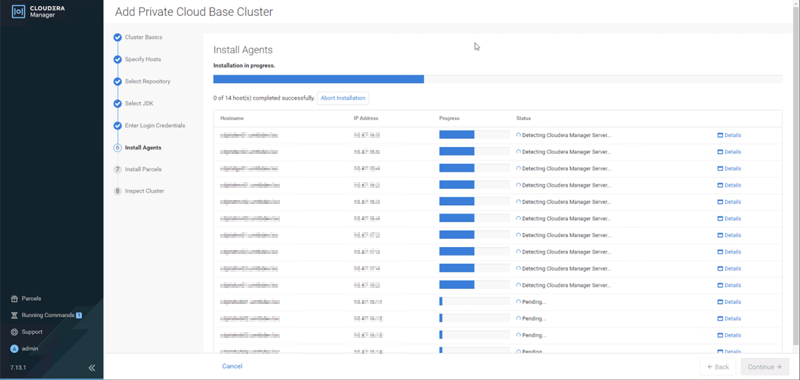
Install Agents
The Install Agents page displays the progress of the installation. You can click on the Details link to view the installation log of any host. Optionally, you can click the Abort Installation button to cancel the installation and then view the installation logs to troubleshoot the problem.
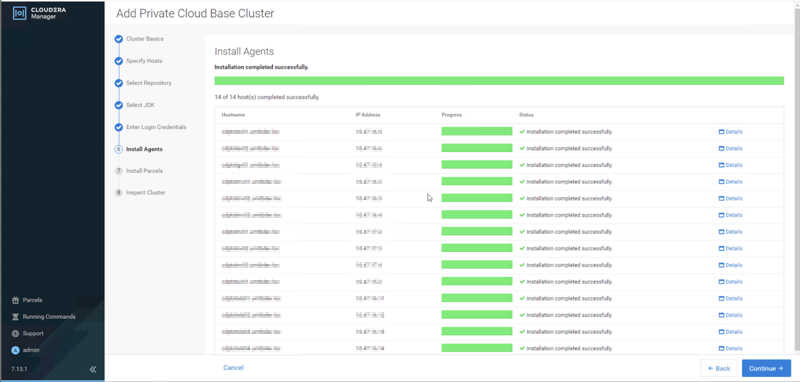
Click Continue.
The Install Parcels page displays.
Install Parcels

After the installation is complete, click Continue.
The Inspect Cluster page displays.
Inspect Cluster
The Inspect Cluster page provides a tool for inspecting network performance as well as the Host Inspector to search for common configuration problems. Cloudera recommends that you run the inspectors sequentially:
- Run the Inspect Network Performance tool. You
can click Advanced Options to customize some
pingparameters. - After the network inspector completes, click Show Inspector Results to view the results in a new tab.
- Address any reported issues, and click Run Again (if applicable).
- Click Inspect Hosts to run the Host Inspector utility.
- After the host inspector completes, click Show Inspector Results to view the results in a new tab.
- Address any reported issues, and click Run Again (if applicable).
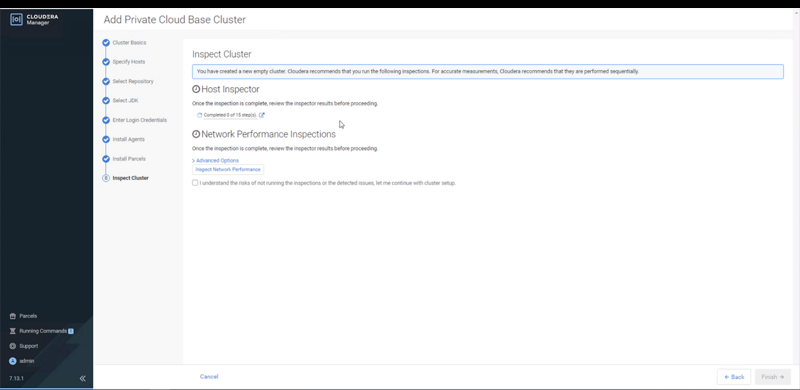
If the reported issues cannot be resolved in a timely manner, and you want to abandon the cluster creation wizard to address them, then click Cancel.
After addressing any identified problems, select I understand the risks of not running the inspections or the detected issues, let me continue with cluster setup, and then click Finish.
This completes the Add Private Cloud Base Cluster wizard operation and launches the Add Cluster - Configuration wizard.
Continue to Step 8: Set Up a Cluster Using the Wizard.