Deleting a Data Share
Permanently delete a Data Share in Cloudera Data Catalog to remove it and revoke all associated user access.
Deleting a Data Share permanently removes it and immediately revokes access for all users who were granted access through it. The underlying Iceberg table assets are not affected. A Data Share can only be deleted when it is in Not Shared status. If the Share is currently published, you must put it into draft state first by clicking Modify.
You must have the DataShareAdmin resource role for the relevant
environment.
-
If the Data Share status is Shared, click
Modify and then click Modify
Share in the confirmation dialog to put the Share back into
draft state.
Figure 1. Modify dialog for a published Data Share 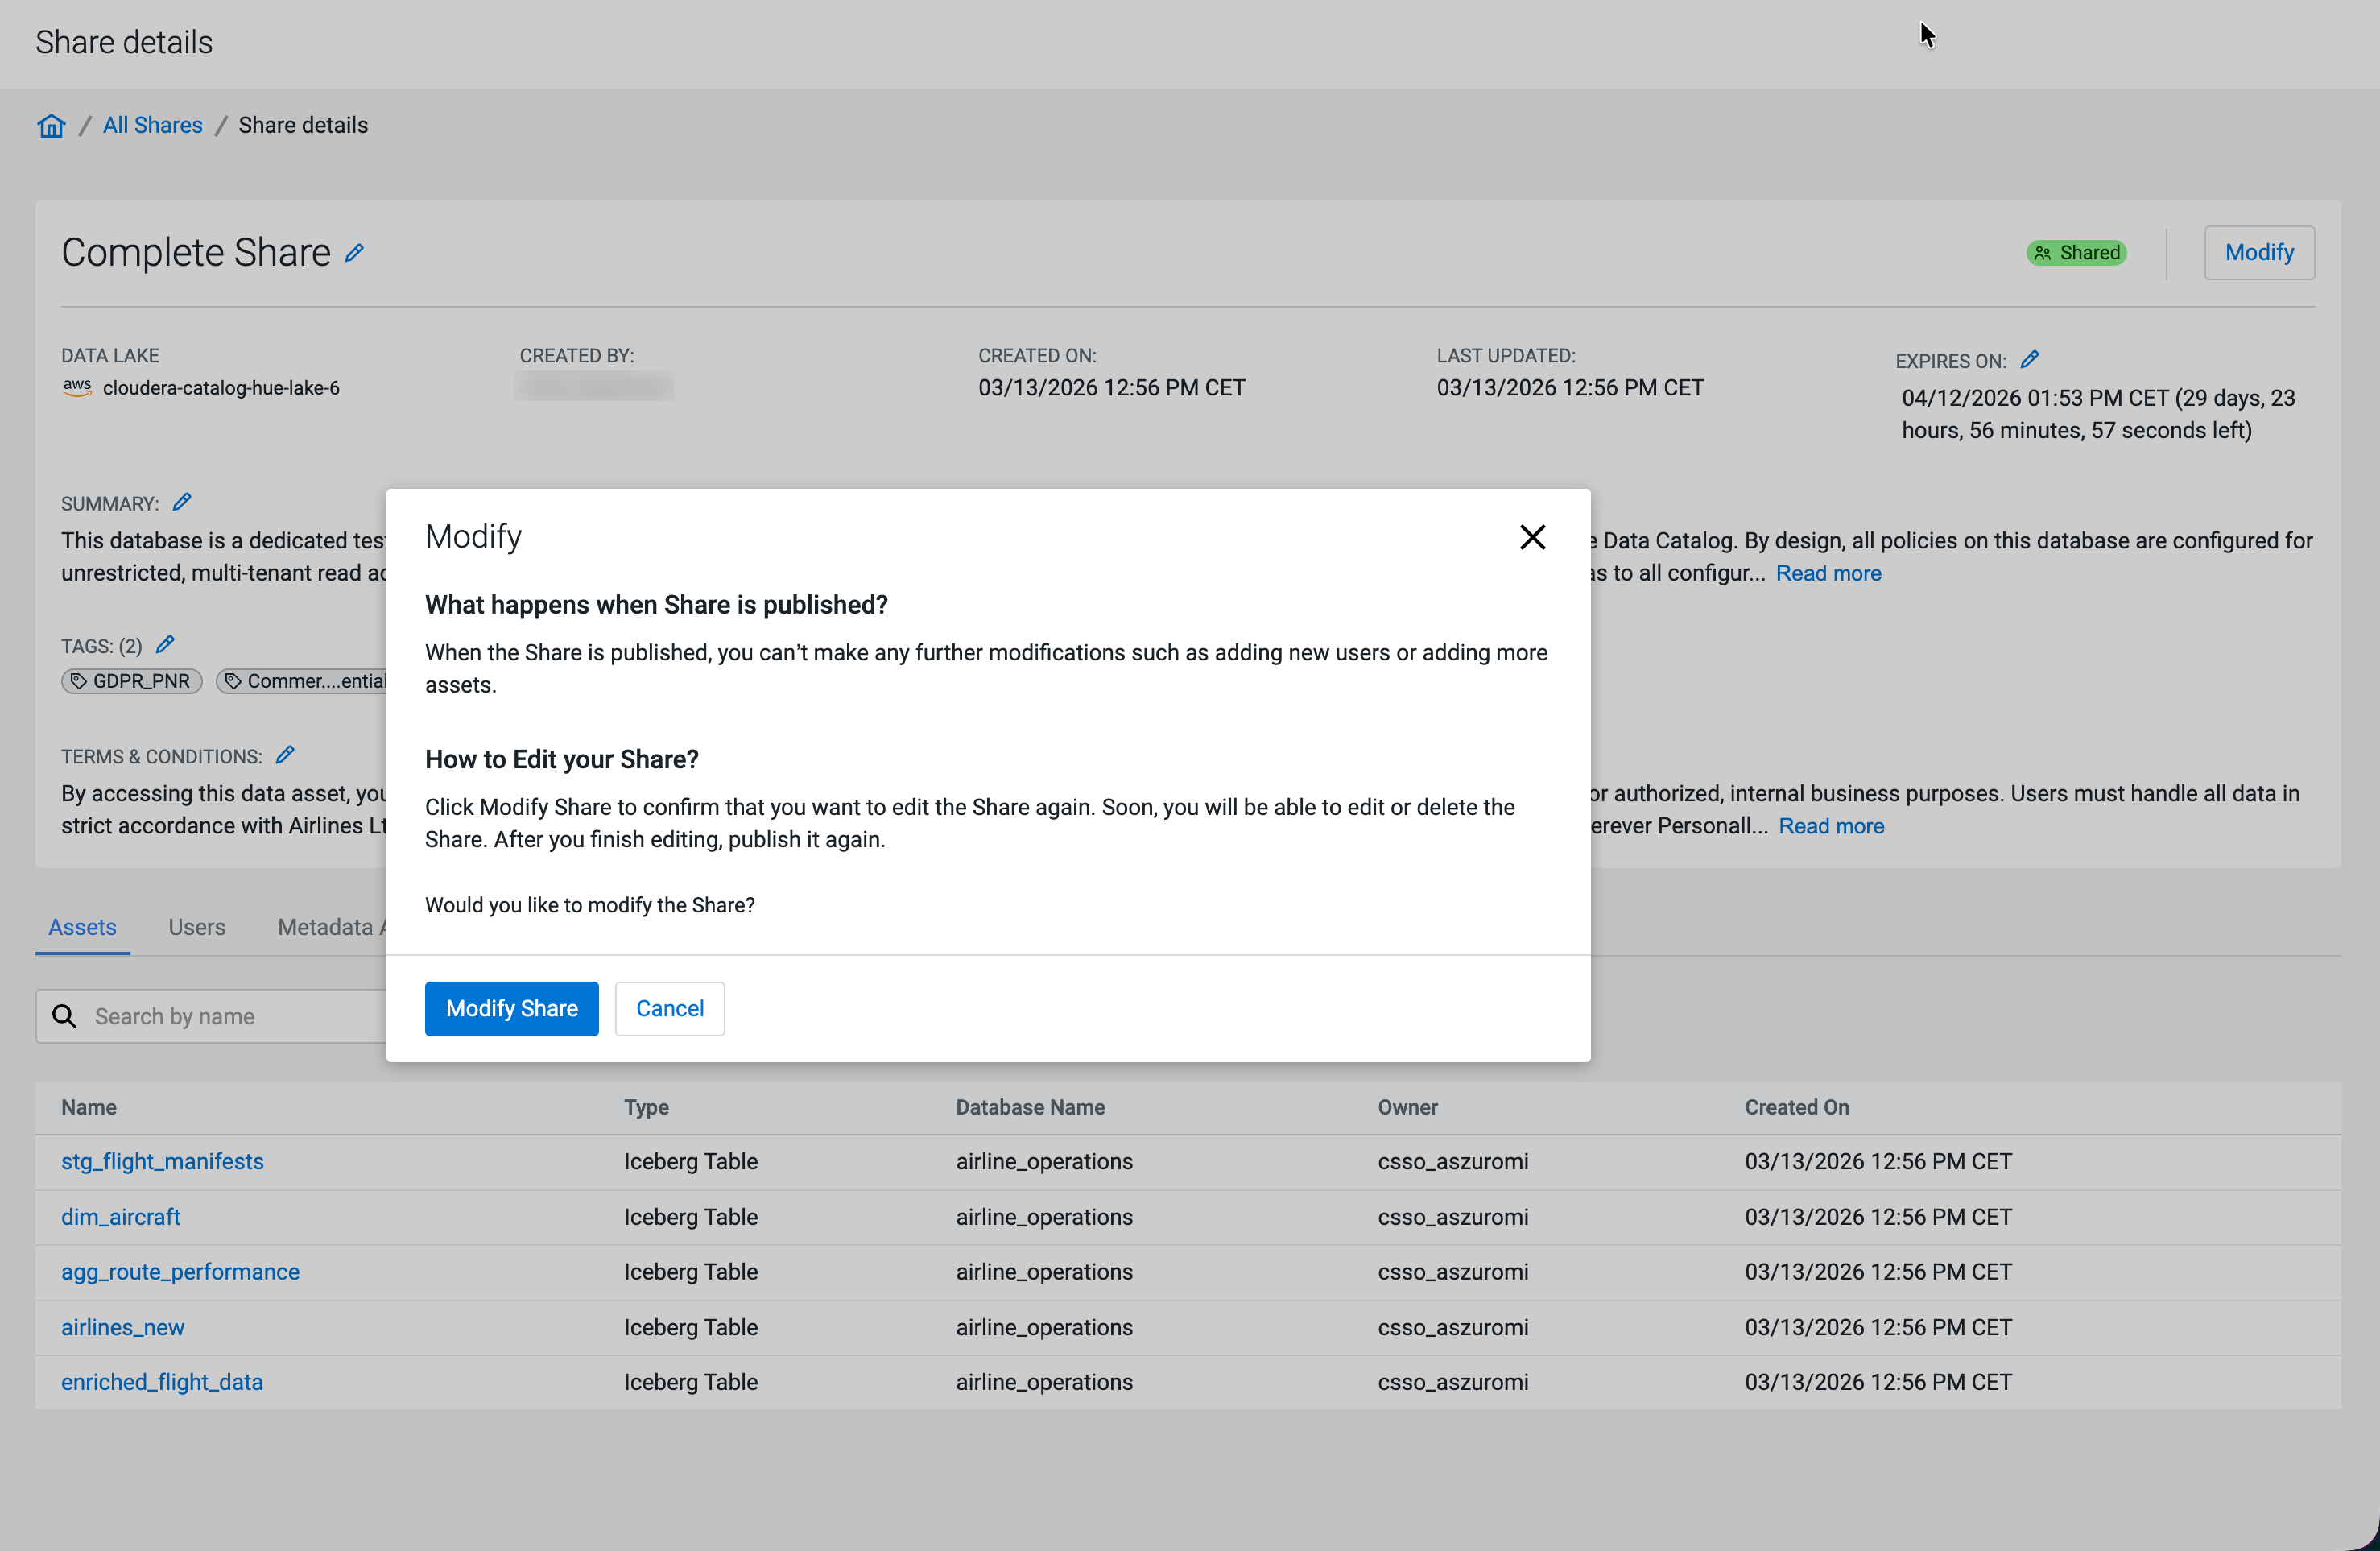
The Share details page reloads with Not Shared status and the Delete button becomes available.
Figure 2. Share details page in Not Shared state 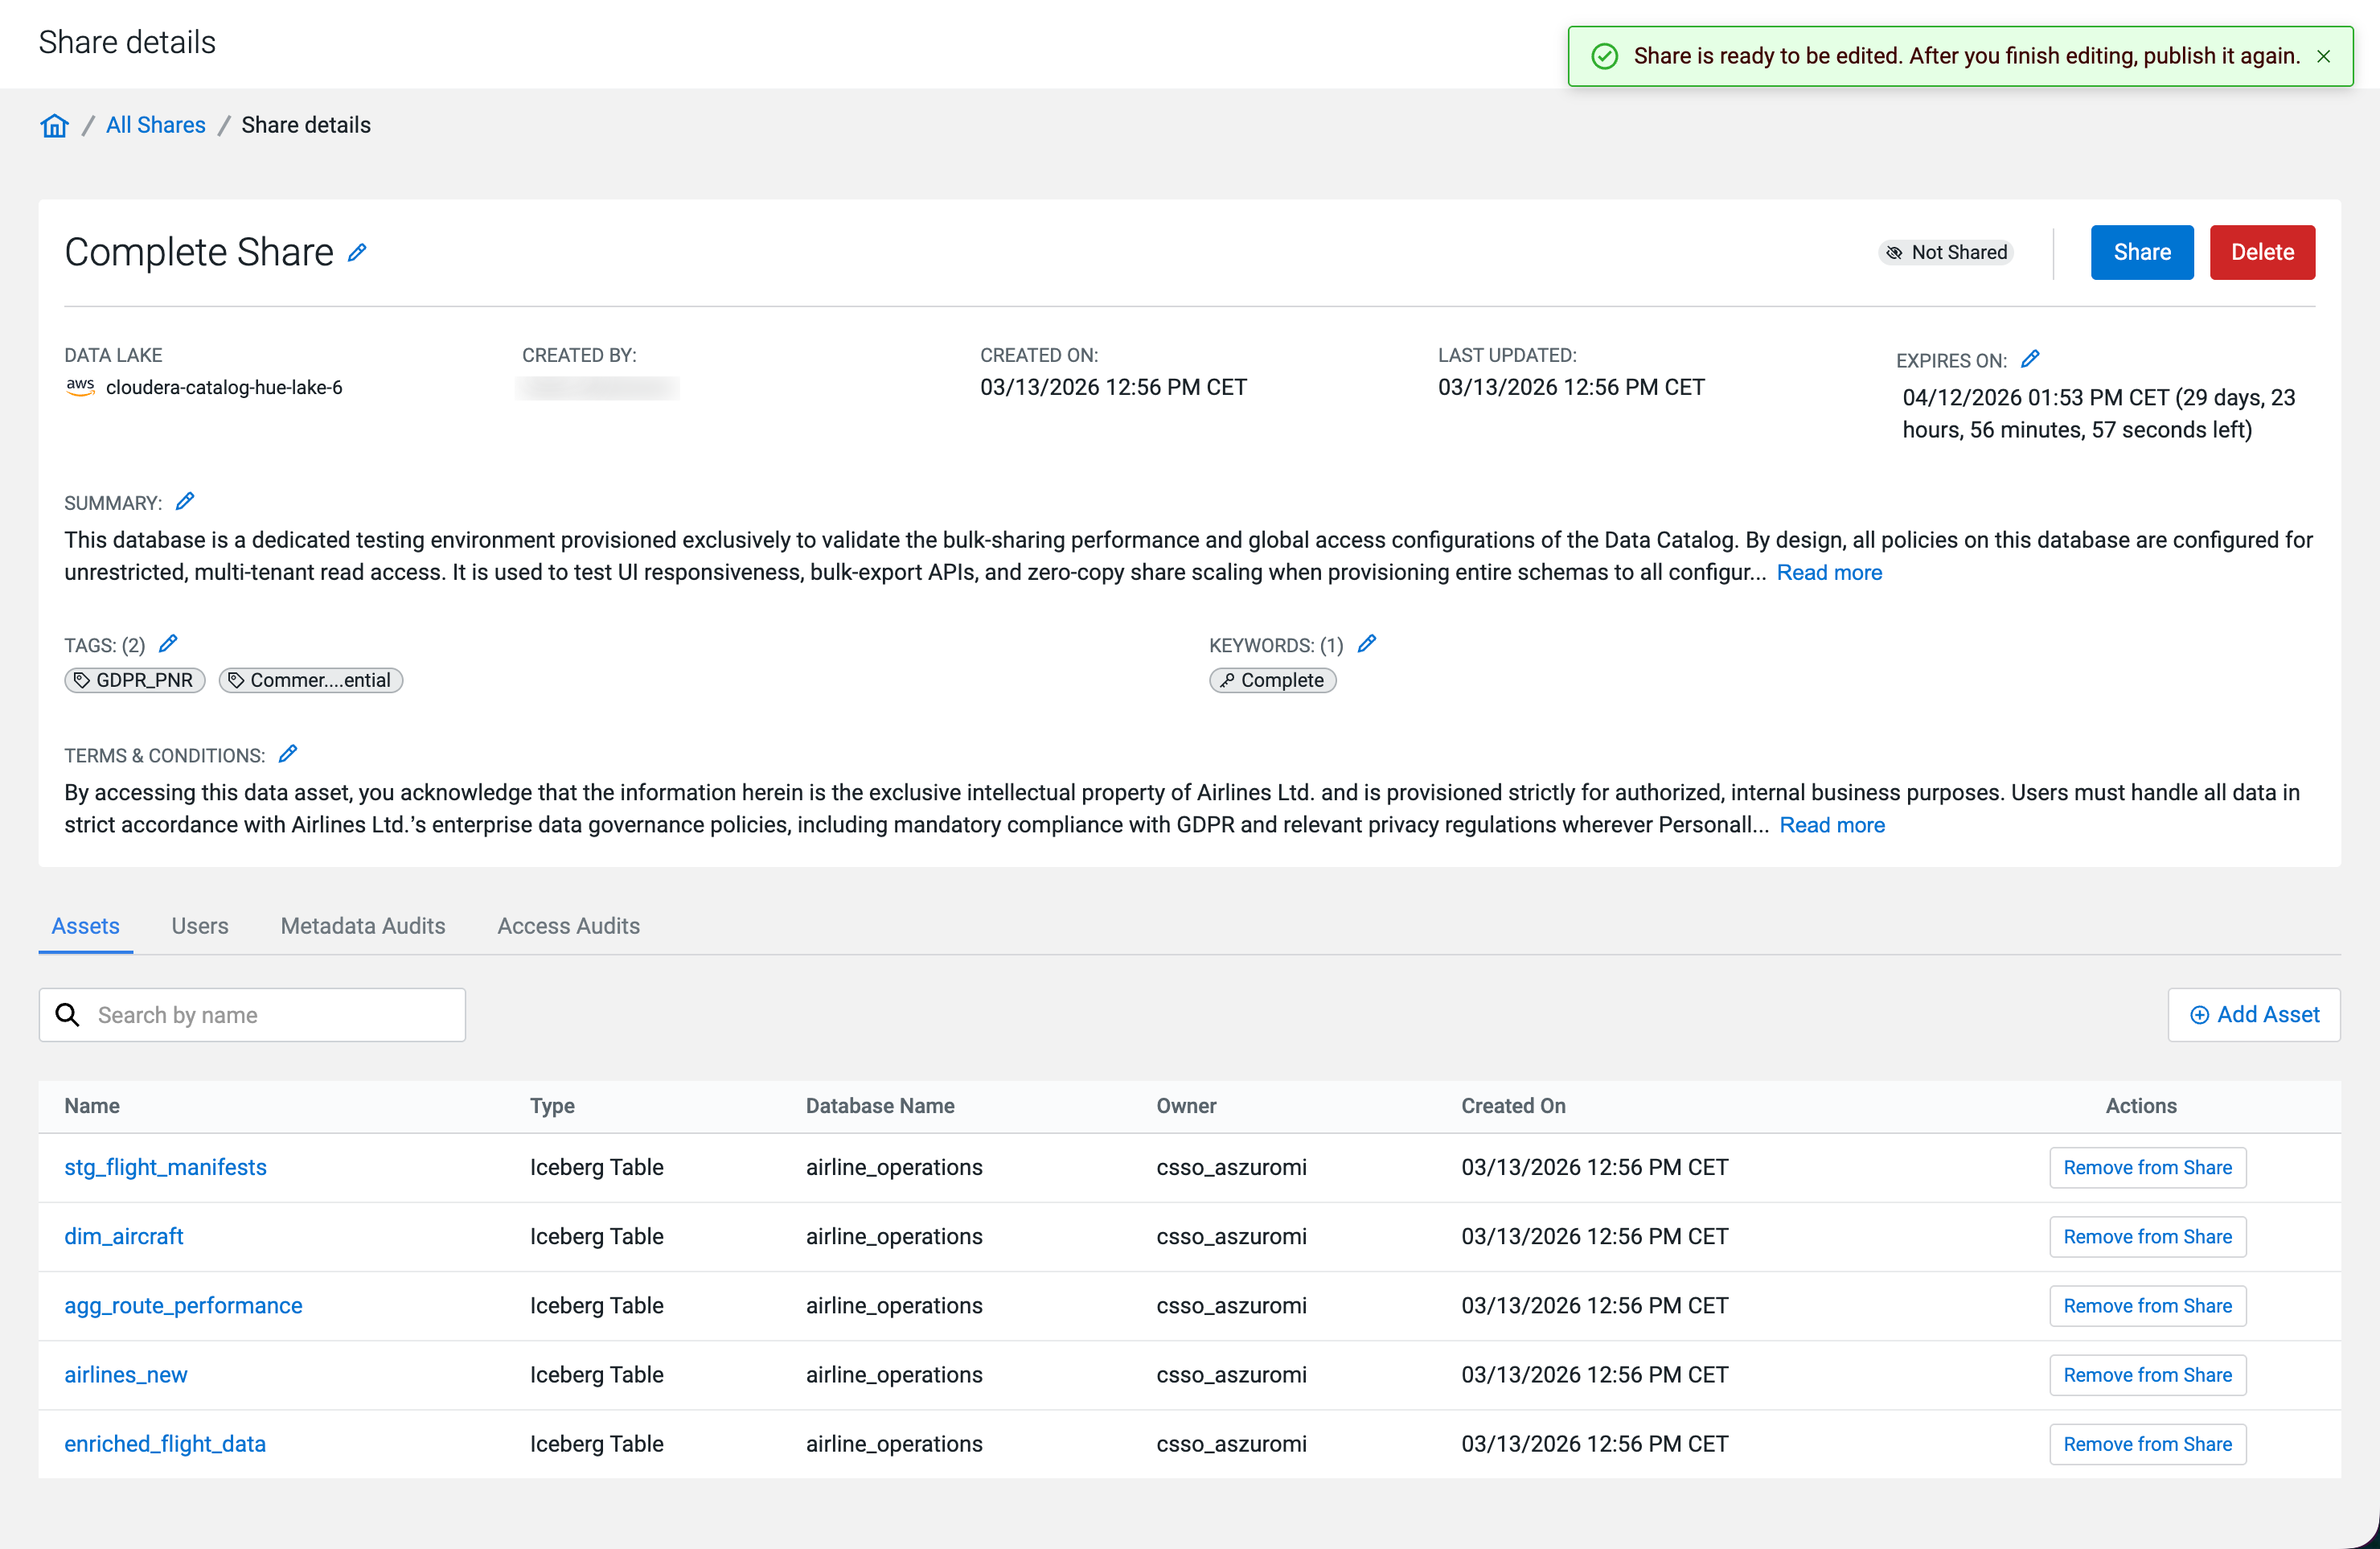
-
In the Delete Share dialog, type the exact share name
in the confirmation field to enable the Delete
button.
Figure 3. Delete Share confirmation dialog 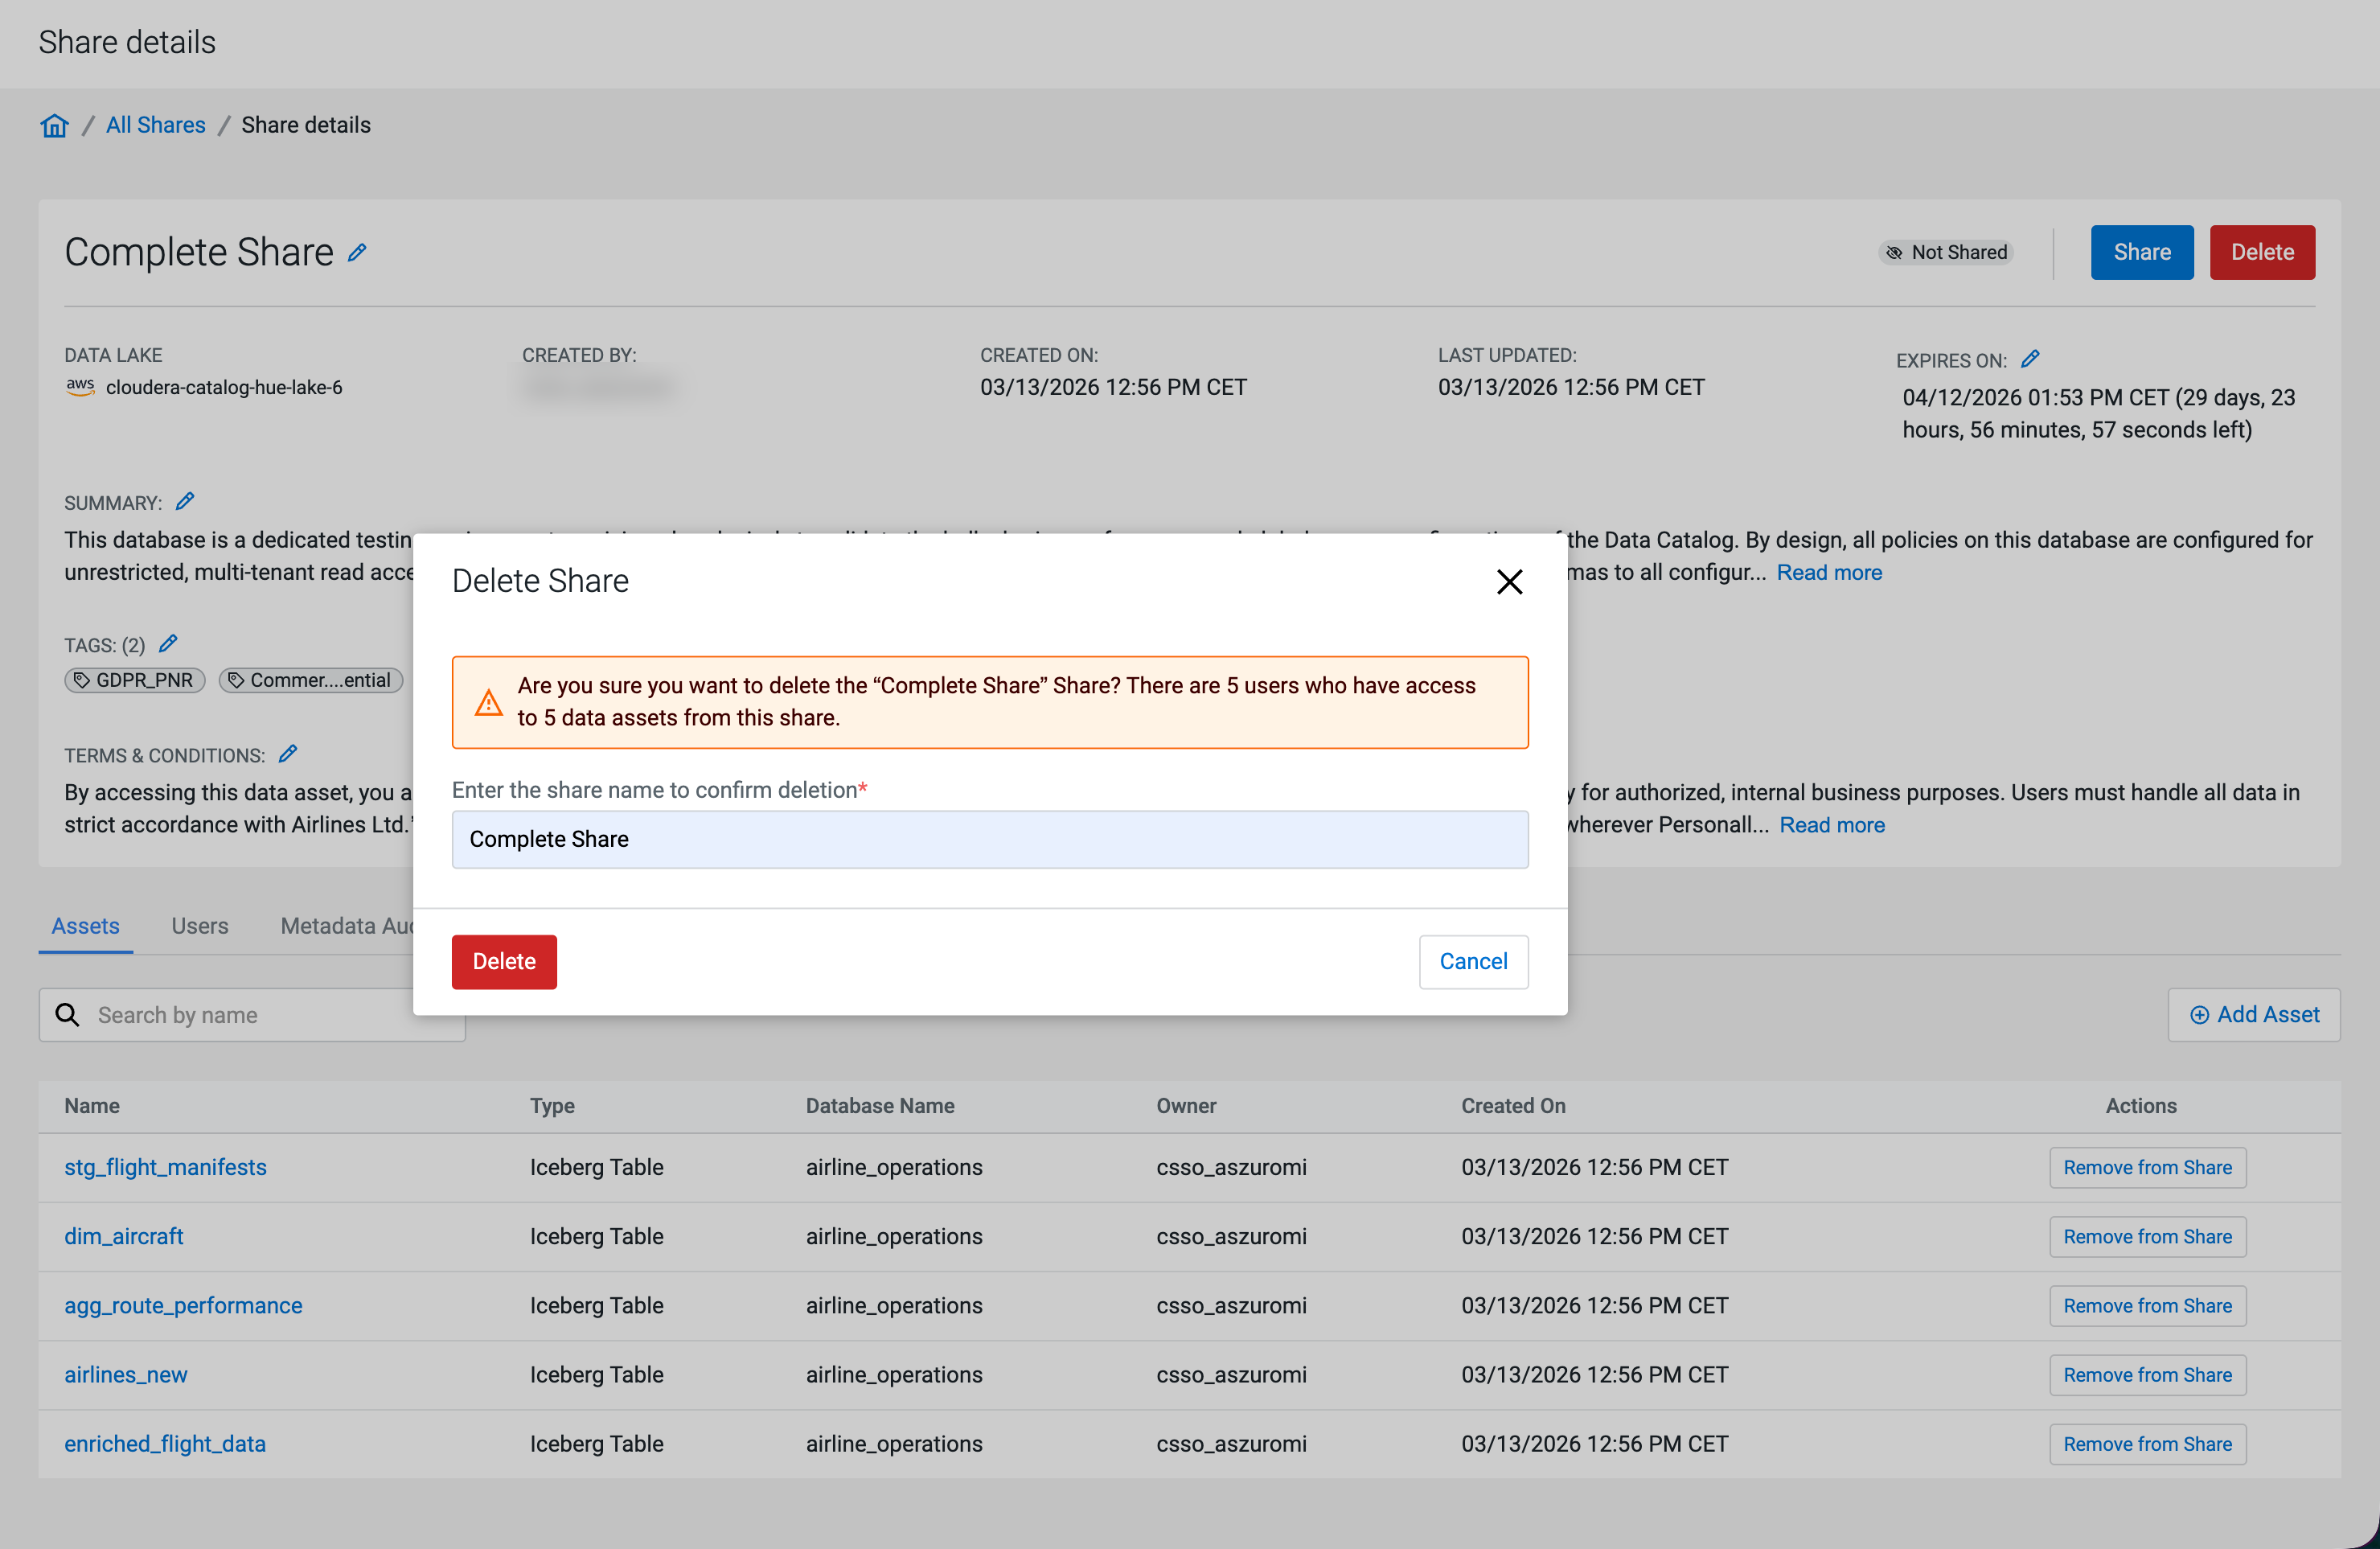
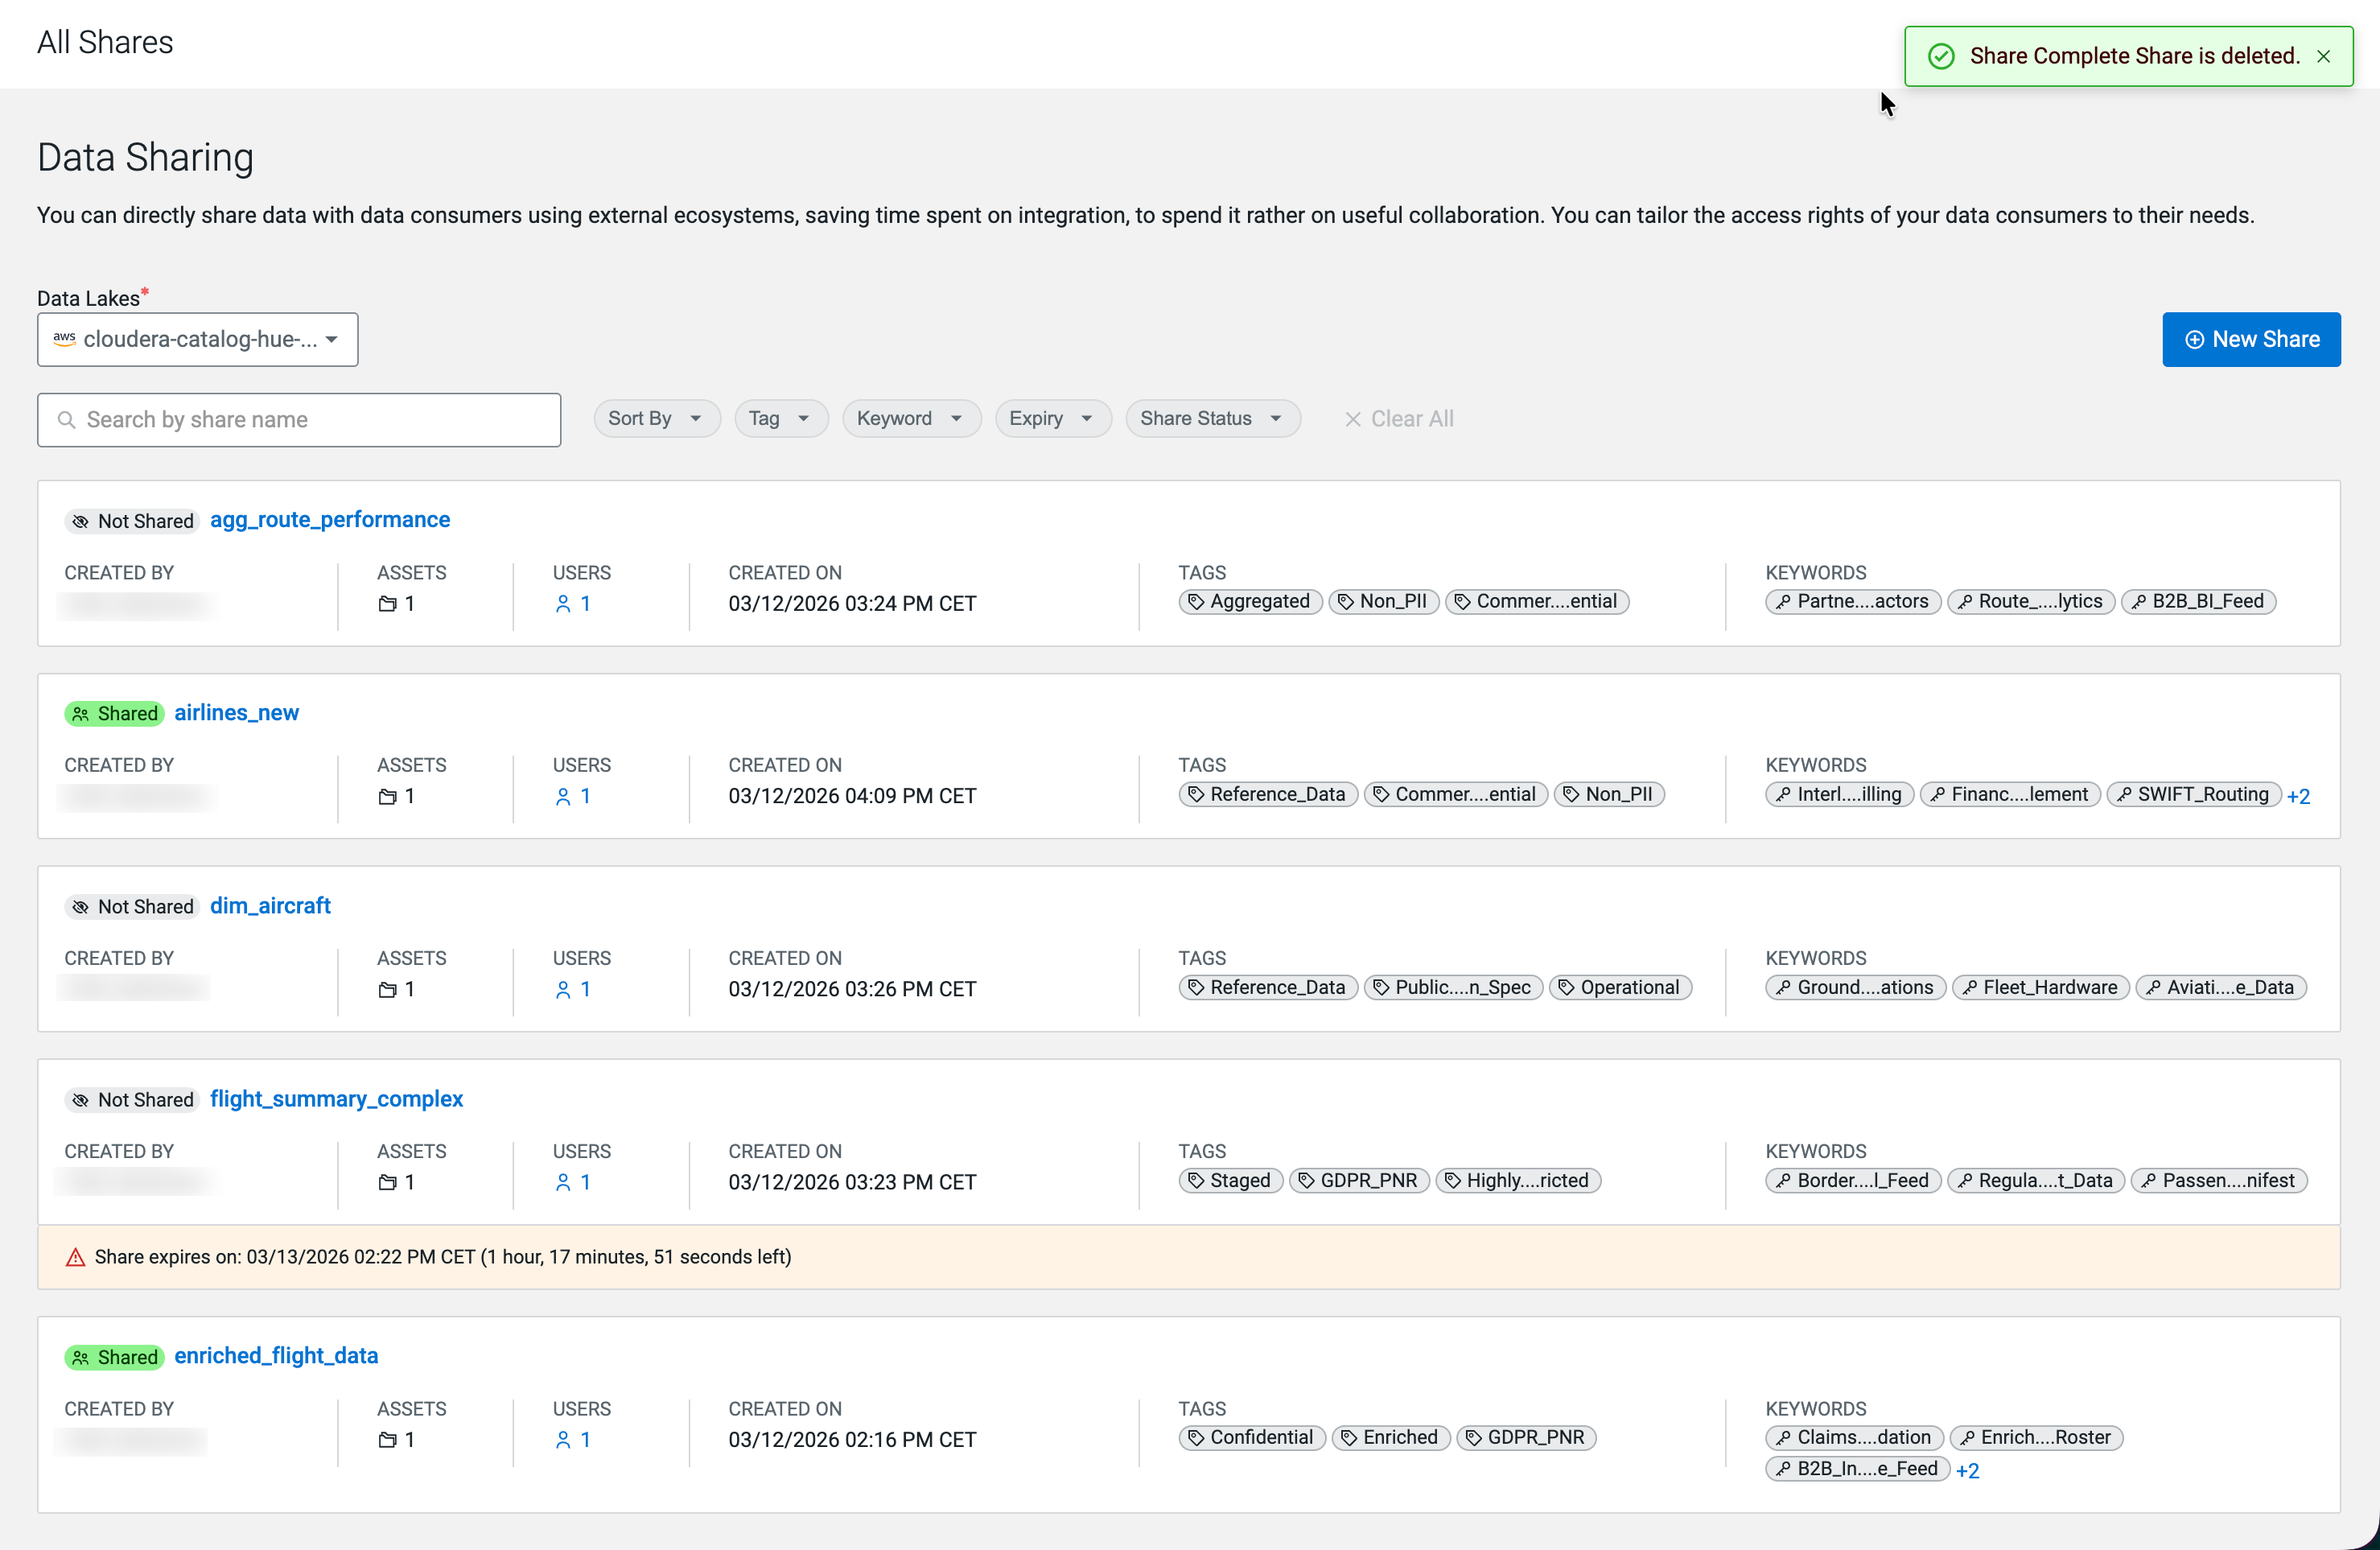
The Data Share is permanently deleted. You are redirected to the All Shares page, where a success banner confirms the deletion.